
The Beginner's Guide to OAuth 2.0 (And Why It Is Not For Login)
Learn how OAuth 2.0 actually works. A beginner-friendly guide covering authentication vs authorization, PKCE, token types, and common security pitfalls.

Author & Creator · CodeToClarity
If there is one concept in modern software development that causes a massive amount of confusion, it is OAuth.
Many developers assume OAuth is a way to log users into an application. That confusion leads to a surprising number of design mistakes. Teams pass around access tokens as if they prove identity, store them in risky places, or keep outdated flows alive because they seem to work. The result is a system that looks modern on paper but leaks security in the seams.
At its core, OAuth lets one application get limited access to another service without handing over the user's password. Used well, it narrows access. Used poorly, it creates a false sense of security.
In this comprehensive guide, we will break down exactly how OAuth works, the difference between authentication and authorization, the crucial roles involved, and how to avoid the most common security traps when building your applications. We will also look at modern security enhancements and practical implementation details to ensure your applications remain robust.
What Problem Does OAuth Actually Solve?
Before we talk about how OAuth works, we need to understand why it exists.
Imagine it is the early days of the internet. You sign up for a new social network. To find your friends, this new app asks for your email password so it can check your contacts. This is a terrible idea. The moment a third party app sees your credentials, you lose separation between your identity, your consent, and your API access. The app could read your contacts, but it could also read your personal emails, send messages as you, or delete your account entirely.
OAuth exists because handing over your password is a fundamentally flawed system boundary.
Think of OAuth like a valet key for your car. When you go to a fancy restaurant, you do not give the valet the title to your car. You do not even give them your normal keys which might unlock your house or the glovebox. You give them a valet key. This special key only allows them to drive the car a short distance and park it. It grants limited permission without handing over full ownership.
OAuth is the valet key of the internet. It allows a web app, mobile app, or background service to access data on another system on your behalf, with your permission, but without ever seeing your actual password or full credentials.
The Four Key Roles in OAuth
Every OAuth transaction involves four distinct roles. Understanding these roles is the secret to making sense of the entire protocol. If you can identify who is playing which role in your system, debugging becomes significantly easier.
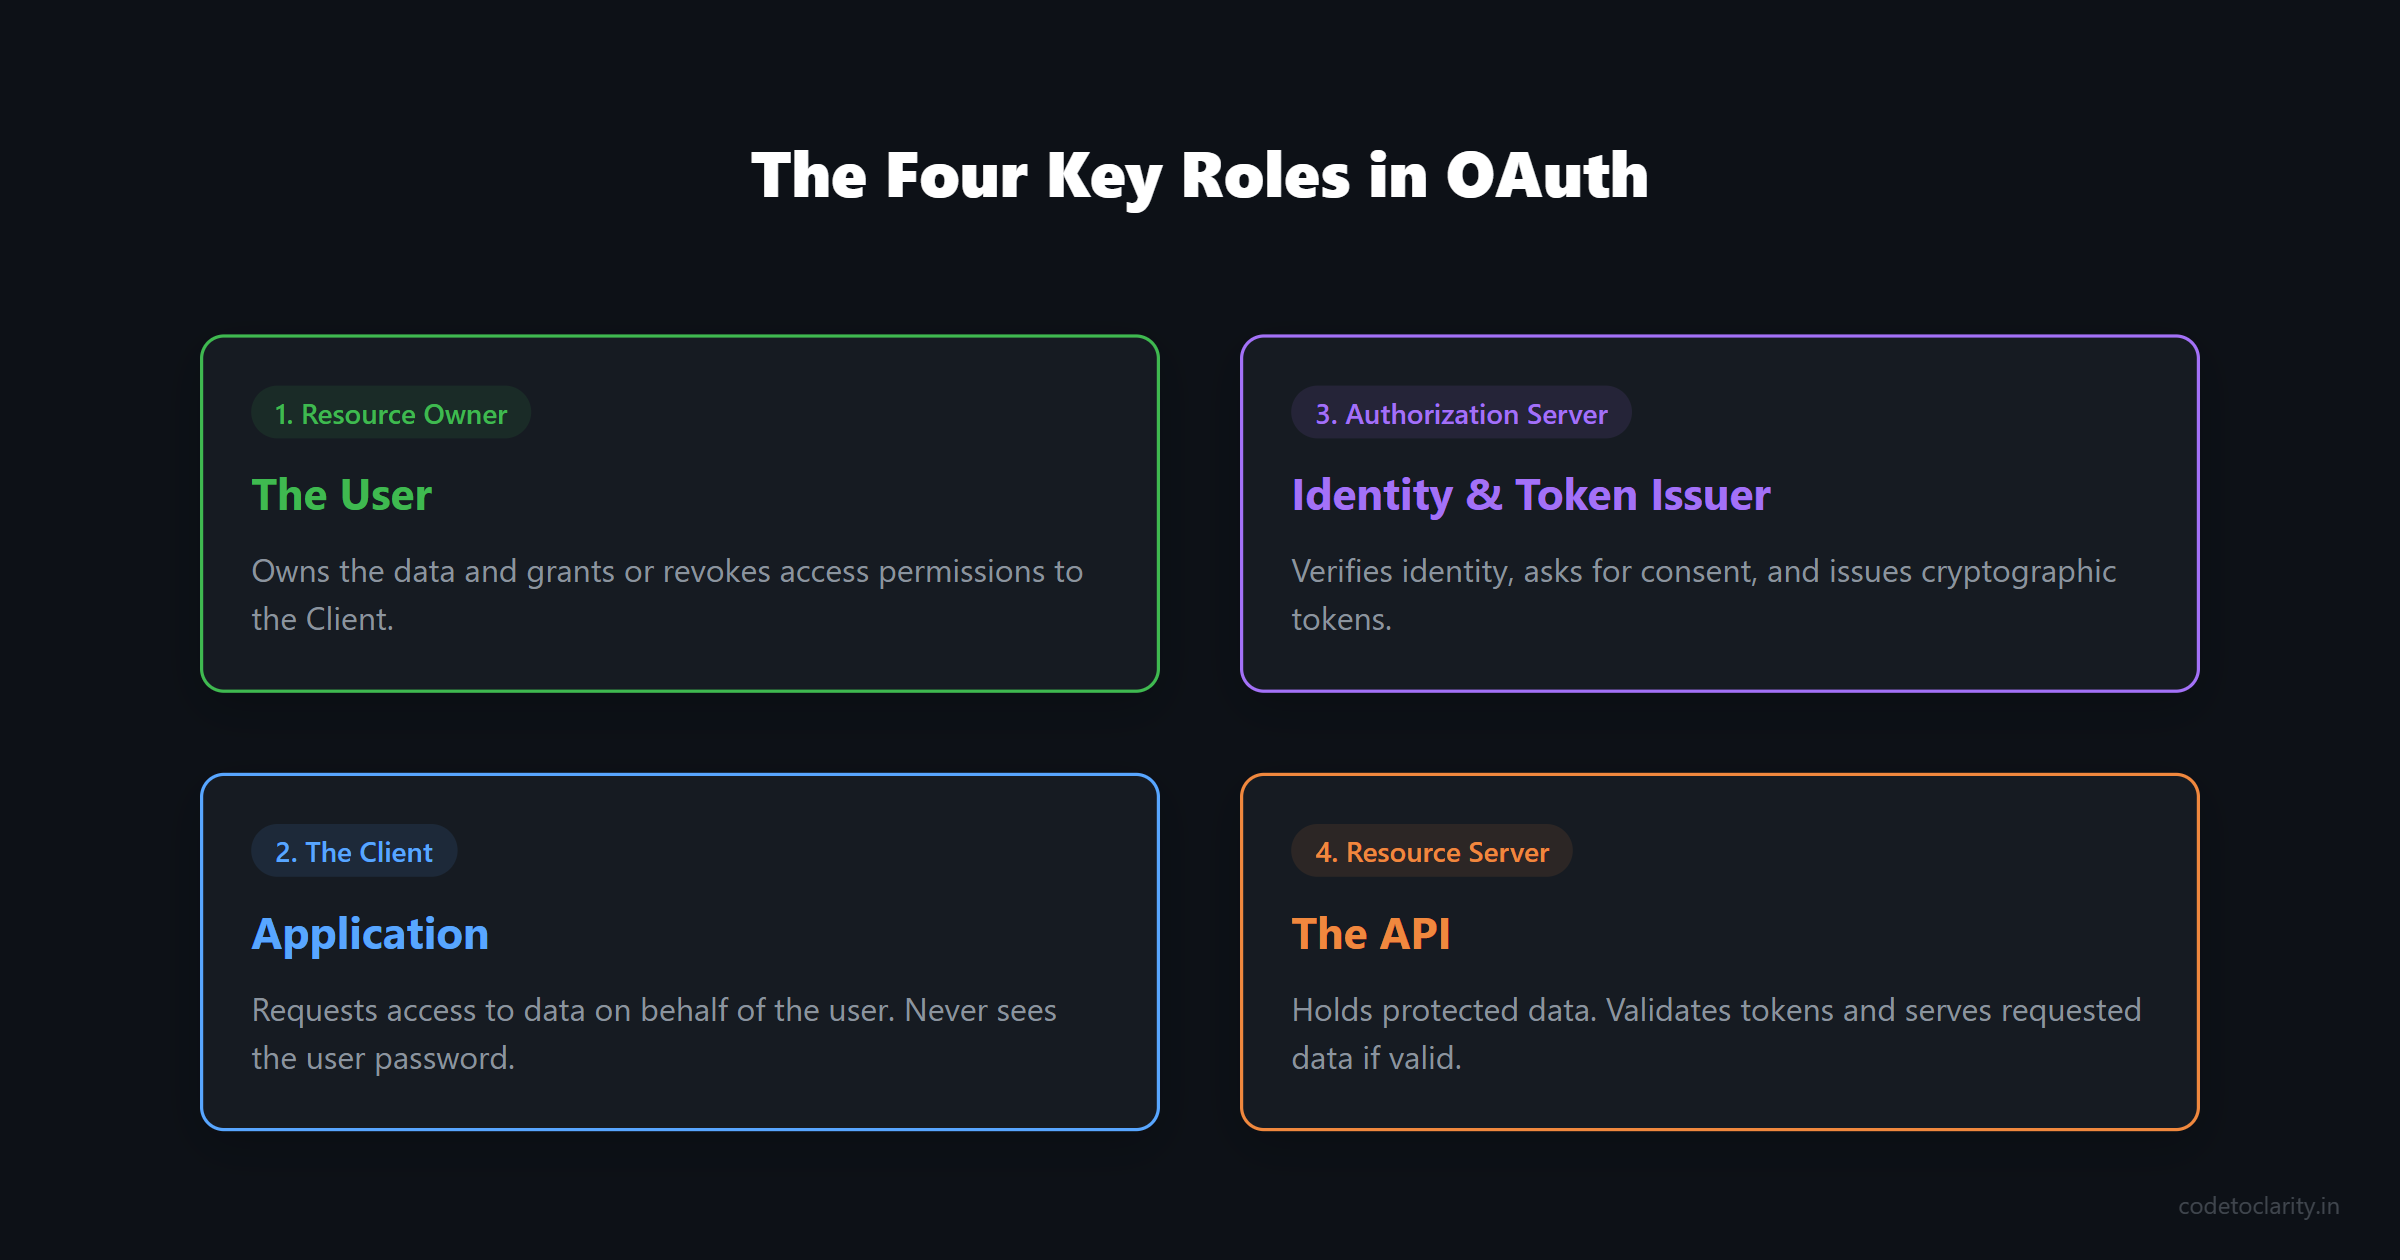
1. The Resource Owner
This is you, the user. You own the data (like your photos on Google Drive, your repositories on GitHub, or your contacts in Microsoft 365) and you are the one who decides what to share. You hold the ultimate authority to grant or revoke access.
2. The Client
The client is the application requesting access to the data. It could be a mobile app on your smartphone, a single page application (SPA) running in your browser, or a background worker service on a server. It wants to do something on behalf of the resource owner.
3. The Authorization Server
This is the bouncer at the club. The authorization server is responsible for verifying the identity of the user, asking for their consent, and ultimately issuing the cryptographic tokens. When you see a "Log in with Google" or "Authorize this app to access your account" screen, you are interacting directly with the authorization server.
4. The Resource Server
This is the API that actually holds the protected data. It does not care about passwords, user interfaces, or login screens. It only cares about validating tokens. If a request comes in with a valid token, the resource server serves the requested data.
The strict separation between the authorization server (which issues tokens) and the resource server (which validates them) is highly intentional. It allows companies to run a single sign-on service across dozens of distinct APIs without coupling their identity infrastructure to every single service.
If you are building backend systems and want to understand how these requests flow through your application pipelines, I highly recommend checking out our guide on Middleware in ASP.NET Core to see how frameworks handle these incoming requests.
The Three Tokens (And Their Different Jobs)
OAuth's token model trips up a lot of developers because the three token types look similar but serve completely different purposes. Mixing them up is a recipe for disaster and is one of the most common security vulnerabilities found in modern applications.
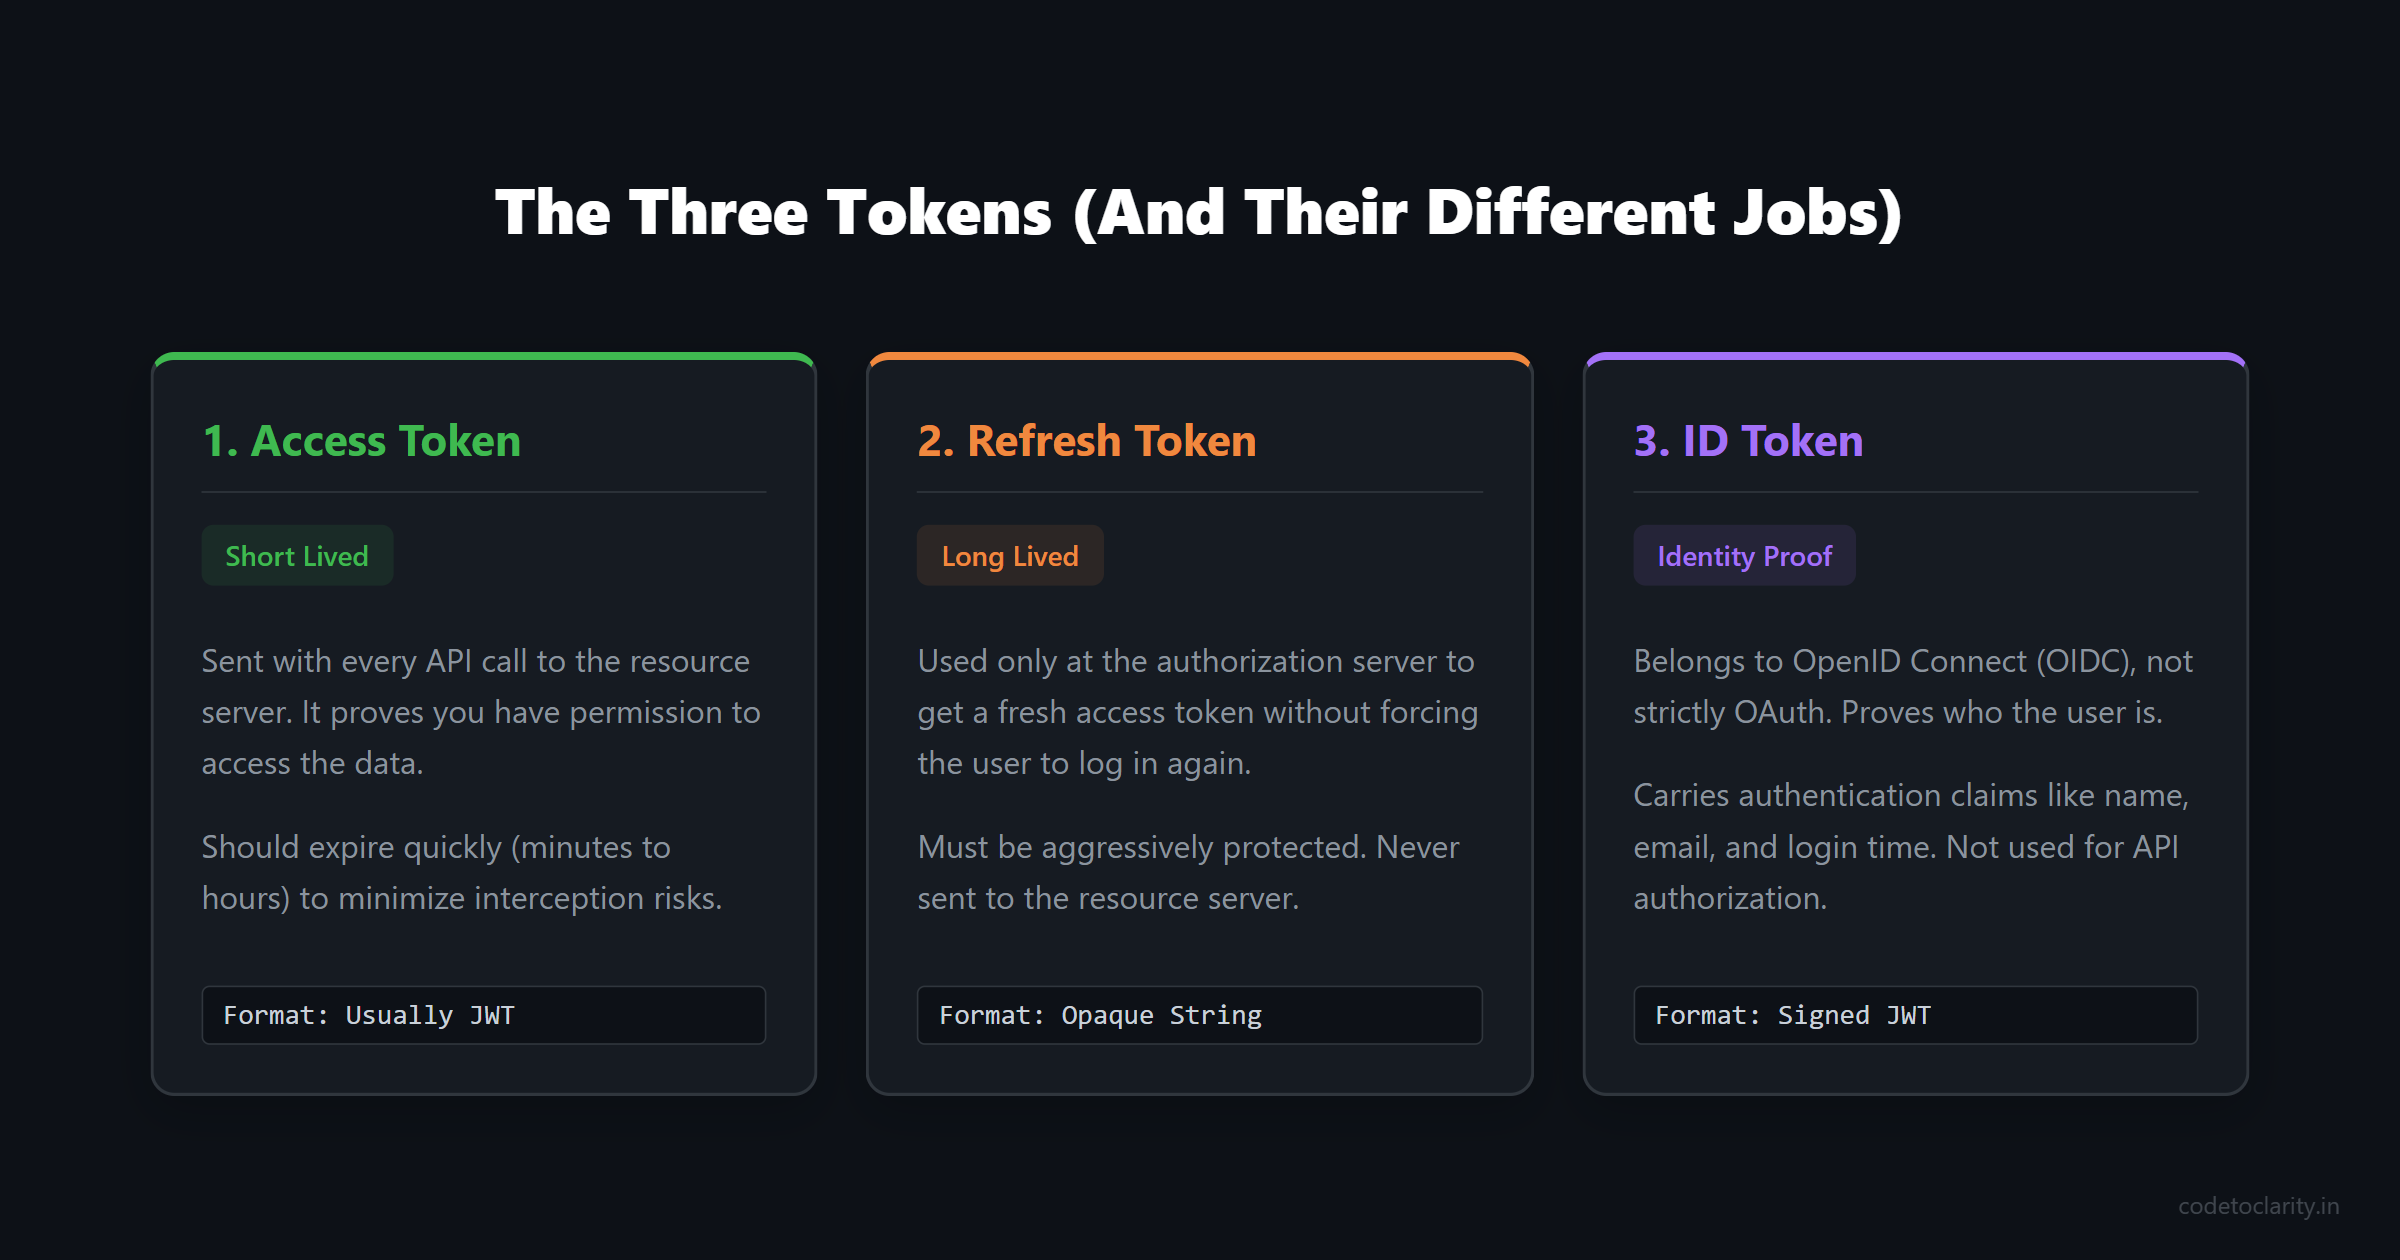
1. The Access Token
This is your short lived credential. The client sends the access token with every single API call to the resource server. The resource server inspects it, verifies its cryptographic signature, checks its expiration, and grants access if everything is valid. Access tokens should have a short lifespan, typically just a few minutes to an hour. Because they are sent with every request, they are more vulnerable to interception.
2. The Refresh Token
Because access tokens expire quickly to minimize risk, we need a way to get new ones without forcing the user to log in again every ten minutes. Enter the refresh token. This is a long lived credential used only at the token endpoint of the authorization server to get a fresh access token.
You must protect refresh tokens aggressively. Never send a refresh token to an API or resource server. If a refresh token leaks, an attacker can silently maintain access long after the original session should have expired, generating as many access tokens as they want.
3. The ID Token
This one is a common gotcha. An ID token is actually not an OAuth token at all.
It belongs to OpenID Connect (OIDC), which adds an identity layer on top of OAuth. While OAuth handles authorization (what the app can do), OIDC handles authentication (who the user is). The ID token is a signed JSON Web Token that carries authentication claims like the user's name, email, profile picture, and when they authenticated.
Treating an access token as a login token or as proof of user identity is one of the most common implementation mistakes in the industry. If you want to understand the structure of these tokens in depth, read our Simple Guide to JSON Web Tokens (JWT).
The Authorization Code Flow Explained
So how do all these pieces fit together? Let us walk through the most standard and secure process, known as the Authorization Code Flow. This is the flow used by the vast majority of web applications today.
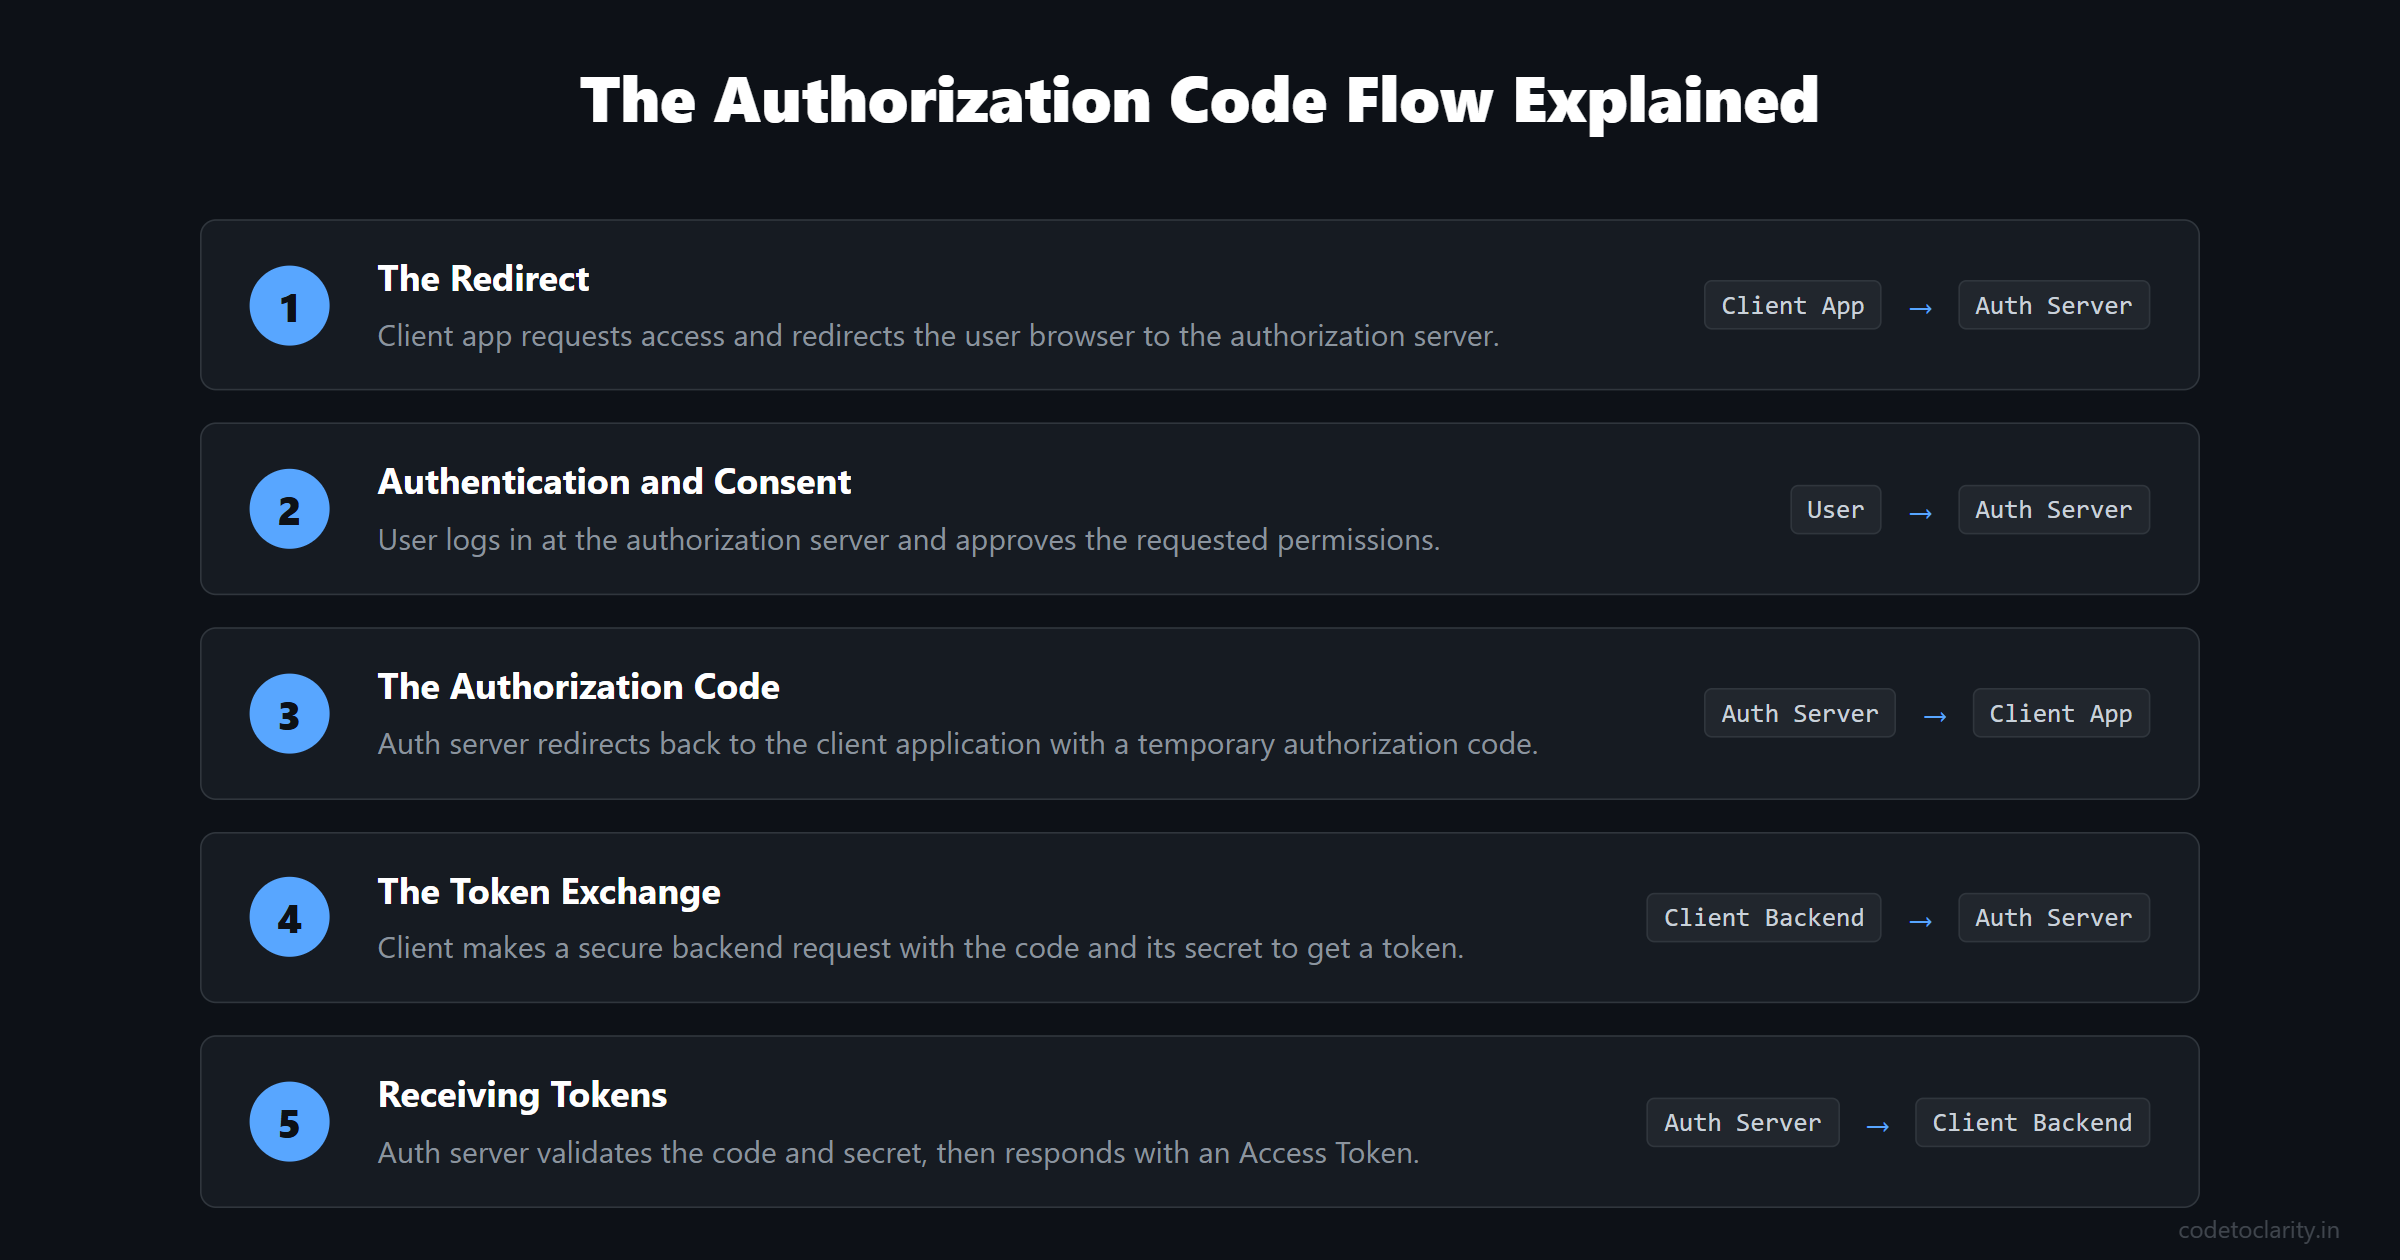
Step 1: The Redirect The client app needs access to a resource. It redirects the user's browser to the authorization server. The URL includes parameters telling the server who the client is and what specific permissions (scopes) it is requesting.
Step 2: Authentication and Consent The user logs in at the authorization server using their credentials (if they are not already logged in). The server then presents a consent screen asking the user to approve the requested permissions. For example, "Application X wants to read your calendar."
Step 3: The Authorization Code Once the user approves, the authorization server redirects the user's browser back to the client application. Attached to this redirect URL is a temporary, single use string called the "authorization code".
Step 4: The Token Exchange The client app takes this authorization code and makes a secure, backend-to-backend request directly to the authorization server. It hands over the code, along with its own secure client secret (a password known only to the client and the authorization server), and asks for a token.
Step 5: Receiving Tokens The authorization server validates the code and the client secret. If everything matches, it responds with an access token (and usually a refresh token). The client can now use the access token to call the resource server.
Notice the elegance of this design. The user's credentials never leave the authorization server, and the access token is never exposed to the user's browser during the redirect. The browser only sees the temporary authorization code.
For a deeper dive into the exact specifications, you can read the official documentation on the Microsoft identity platform and OAuth 2.0 authorization code flow.
The PKCE Security Upgrade
The standard Authorization Code flow is great, but it relies on a "client secret" to prove the identity of the client application during the token exchange step.
But what if you are building a Single Page Application (SPA) in React, or a mobile iOS application? These are considered "public clients" because they run entirely on the user's device. You cannot store a secret securely in frontend JavaScript or a compiled mobile binary. Anyone can inspect the code, decompile the app, and extract the secret.
If an attacker intercepts the authorization code during the browser redirect (perhaps through a malicious browser extension or a compromised network), they could exchange it for an access token themselves, because there is no secret to prove they are not the real application.
To solve this, the industry introduced PKCE (Proof Key for Code Exchange).
PKCE adds a dynamic secret created on the fly for every single login attempt.
First, the client app generates a cryptographically secure random string called a code_verifier.
Then, it creates a hashed version of this string called the code_challenge.
When redirecting the user to the authorization server in Step 1, the client sends the code_challenge. The server stores it temporarily.
When the client exchanges the authorization code for a token in Step 4, it sends the original plain text code_verifier.
The server hashes the code_verifier itself and checks if it matches the code_challenge it remembered from Step 1. If they match, the server knows the application requesting the token is the exact same application that started the flow. Even if an attacker steals the authorization code, they do not have the random code_verifier, so their token request will be rejected.
PKCE is so incredibly effective that best practices now mandate using it for all applications, even backend server side web apps that can keep a secret. You can find the formal specification for PKCE in RFC 7636 on the IETF website.
Going Beyond Bearer Tokens
Under the hood, OAuth typically uses bearer tokens. A bearer token means that whoever "bears" or possesses the token can use it. There is no built in proof of identity or cryptographic binding for standard bearer tokens. The API simply trusts whoever presents it in the authorization header.
As a result, token leakage is effectively credential theft. If an attacker gets your access token, they can impersonate your application until the token expires.
For high security environments like banking or healthcare, the industry is moving toward sender constrained tokens. These mechanisms ensure that a token can only be used by the specific client it was issued to.
Mutual TLS (mTLS): This binds the access token to the client's TLS certificate. When the client makes an API call, the resource server verifies that the TLS certificate used to establish the connection matches the certificate hash embedded inside the token. An attacker with a stolen token cannot use it because they do not have the client's private TLS key.
Demonstrating Proof of Possession (DPoP): This binds the token to a public/private key pair generated by the client application. The client signs every API request with its private key, proving possession. The resource server validates the signature before accepting the token.
While these add complexity to your architecture, they completely close the gap that bearer tokens leave open.
Common Security Pitfalls and How to Avoid Them
Even with a strong understanding of the protocol, implementation details matter. Here are the most common pitfalls to avoid when implementing OAuth systems.
1. Weak Redirect URI Validation
When the authorization server redirects back to your application with the authorization code, it uses a Redirect URI. If you do not strictly validate this URI on the server side, an attacker might trick the server into sending the code to a malicious site. Never use wildcards in your redirect URIs. Always use exact string matching to ensure codes only go to trusted destinations.
2. Storing Tokens in LocalStorage
For web applications, storing access or refresh tokens in localStorage makes them highly vulnerable to Cross Site Scripting (XSS) attacks. Any malicious JavaScript running on your page (even from a third party dependency) can read localStorage and exfiltrate the tokens to an attacker.
The safest route for SPAs is often using a Backend-for-Frontend (BFF) pattern. The browser talks to your backend using secure, HTTP-only, encrypted session cookies. Your backend handles the OAuth flow entirely and holds the actual tokens in memory or a secure distributed cache like Redis.
3. Ignoring the State Parameter
The state parameter is used to prevent Cross Site Request Forgery (CSRF) attacks. You should generate a random, unguessable value, store it locally (usually in a cookie), and send it with the initial authorization request. When the server redirects back, it includes this exact state. You must verify that the returned state matches your stored value before proceeding. If it does not match, the request might have been initiated by an attacker trying to trick the user into logging into the attacker's account.
4. Over-Scoping Tokens
Always practice the principle of least privilege. Do not ask for full write access to a user's entire account if your application only needs to read their profile picture. If a token with limited scopes is compromised, the blast radius of the attack is significantly reduced. Users are also much more likely to abandon your application during the consent screen if you ask for excessive permissions.
If you are interested in adding robust security layers to your application, you should also read our guide on Implementing Two-Factor Authentication (2FA) in .NET with TOTP and QR Codes.
Implementing Resource Servers in .NET
If you are building an API that needs to accept and validate OAuth tokens, ASP.NET Core makes this remarkably straightforward using the built in authentication middleware. You do not need to write custom token parsing logic.
Here is a practical example of how you might configure a Minimal API to validate incoming JWT access tokens using a theoretical CodeToClarity authorization server.
using Microsoft.AspNetCore.Authentication.JwtBearer;
using Microsoft.IdentityModel.Tokens;

var builder = WebApplication.CreateBuilder(args);

// Configure the authentication services for Bearer tokens
builder.Services.AddAuthentication(JwtBearerDefaults.AuthenticationScheme)
    .AddJwtBearer(options =>
    {
        // The authority is the URL of your Authorization Server
        // ASP.NET Core will automatically fetch the public signing keys from this URL
        options.Authority = "https://auth.codetoclarity.in";

        options.TokenValidationParameters = new TokenValidationParameters
        {
            ValidateIssuer = true,
            ValidIssuer = "https://auth.codetoclarity.in",
            ValidateAudience = true,
            ValidAudience = "codetoclarityService_api",
            ValidateLifetime = true,
            // Add a small clock skew to account for server time differences
            ClockSkew = TimeSpan.FromMinutes(2)
        };
    });

builder.Services.AddAuthorization();

var app = builder.Build();

// Ensure the middleware is added to the pipeline
app.UseAuthentication();
app.UseAuthorization();

// A protected endpoint that requires a valid token
app.MapGet("/api/secure-data", () =>
{
    return Results.Ok(new { Message = "You have a valid access token and are authorized!" });
}).RequireAuthorization();

app.Run();
In this setup, the application automatically handles grabbing the bearer token from the Authorization header of the HTTP request. It fetches the cryptographic signing keys from the authorization server's discovery endpoint, and validates the token signature, audience, and expiration before letting the request reach your endpoint.
If you are just getting started with APIs in the .NET ecosystem, check out our guide on how to Build High-Performance APIs with .NET Minimal APIs for more foundational concepts and architectural patterns.
Wrapping Up
OAuth gives applications permission to act on behalf of a user, not identity to impersonate them.
Every design decision in the framework exists to keep that boundary clean and secure. We use short token lifetimes to reduce risk if a token is stolen. We separate the authorization server from the resource server to centralize security and scale independently. We use PKCE to ensure the application that starts the authorization flow is the exact same one that finishes it.
When something goes wrong with an OAuth implementation, it almost always traces back to that boundary getting blurred. Perhaps an access token is being used to prove identity on a frontend client, a scope was granted that was never actually needed for the business logic, or a token meant for one specific API is being blindly accepted by another.
Keep the boundary clear between authentication (who the user is) and authorization (what the app is allowed to do). By understanding the distinct roles, token types, and modern security standards like PKCE, the rest of OAuth becomes straightforward, secure, and incredibly powerful for your distributed applications.
Software engineer passionate about building scalable, production-grade applications with C#, .NET, and modern cloud technologies. Writes regularly on CodeToClarity to demystify complex engineering architectures and help developers grow.
Related Technical Guides
API Key Authentication & Management in ASP.NET Core: Constant-Time Hashing, Scoping, and Secure Storage
Master API key authentication in ASP.NET Core 9. Learn Stripe-style prefixed keys, CRC32 checksums, SHA-256 hashing, FixedTimeEquals, and Redis caching.
Secure Refresh Token Rotation & Revocation: Preventing Token Theft and Replay Attacks in Distributed APIs
Prevent token theft and replay attacks in distributed APIs. Master Refresh Token Rotation, Token Family tracking, HttpOnly cookies, and ASP.NET Core 9 with Redis.
How Single Sign-On (SSO) Actually Works: A Complete Beginner's Guide
Learn how Single Sign-On (SSO) works under the hood. Discover the magic of Identity Providers, the Same-Origin Policy, and secure token validation in this beginner-friendly guide.